Thursday, April 9, 2015

CLASS 10: Second Life SANDBOXES

This is when I first entered the sandbox.
I like how my avatar raises his hands as he builds the object. I built a hallow cylinder!
Next I built this triangular prism. I increased the size to 5x5x5 meters. It's a lot bigger than my other object!
Look at the huge sphere I built. I found moving the object in space to be rather straight forward and simple. They even have a measuring ruler to show you the dimensions in space.
 Next sandbox I went to was Shiromani Sandbox.
I wasn't able to build in the original entrance but could in this open land.
Trying to build a house by making a giant cube and then changing the texture of it to bricks.
I added a roof to it and changed the texture again. Not bad for a house!


Final #4: High Resolution Avatar

This is what I was prompted with after immediately opening the program.
image
This is after I edited some basic features such as height, weight, gender, and ethnicity as well! For height I converted my 5'11'' height to centimeters and found it be roughly 180 cm.
image
I was really shocked with how many different features you could customize. I feel like you could really create a good representation of yourself if you spent not only the time but knew how to maximize the programs use.
image
I put a suit on myself to make him look very professional and classy!
image
You could also configure poses/animations for your person as well.
image
This is after I changed more settings and also notably gave myself some hair. I don't think he looks exactly like me but not bad? What do you guys think!
 This is Final#4 that uses the program MakeHuman. There are many features that you can customize to make the avatar look closely to yourself. It had many more customizable feature than the other virtual reality programs we have used thus far. It is a final exercise from the Immersive Education course that I am taking at Boston College. The course is called Discovering Computer Graphics. For details, visit the immersive BC portal at http://ImmersiveEducation.org/@/bc

FINAL 5c: MY CUSTOMIZED JAVA GAME

 I took the class Video Games and Virtual Reality with Professor Walsh last spring. Here's the link to my game: http://www.greenfoot.org/scenarios/10899.

This is the last part of the final where I changed the images of the turtle and the snake to a photo of me and the iED photo. I changed it to a space themed game. It is a final exercise from the Immersive Education course that I am taking at Boston College. The course is called Discovering Computer Graphics. For details, visit the immersive BC portal at http://ImmersiveEducation.org/@/bc

Thursday, March 26, 2015

Class 10: Monocular Depth Cues

This screenshot was taken from Second Life. This is one of the examples of monocular depth cues. This example in particular is known as size difference. As you can see I have circled two trees in the picture. One tree is further from my character than the other thus it is smaller on the screen. This gives the 3D illusion by utilizing size to show how one would realistically perceive these objects.

 This screenshot was taken from Minecraft. This is an example of occlusion which is another example of a monocular depth cue. Occlusion is when an object blocks  or occludes something visually emphasizing the fact that the blocking object is closer. In this example the cow is blocking the background hill which visually shows that the cow is closer to you in the 3D space than the hill in the back.

 This is an example of the third monocular depth cues. This is an example of Light and Shading taken from Second Life yet again. If you look at the red circle you can see that the face of the gray step is very bright and defined. If you then look at the black circle, you can see a darker shade of gray is used because of how the light is contacting and hitting the concrete step. The light is therefore coming from the rightside.
 This is the fourth example of monocular depth cues. This is the example of Texture Density. As you can see in Second Life here the tiles that are closer to my avatar are much more spaced and clearly defined. The same pattern continues in the distance but logically as it would in real life the patterns are harder to define.
This is an example of Linear Perspective. The point that is circled is the vanishing point in our eyes of the wall that is next to my avatar. The wall gets more narrow as it goes further off into the distance until it eventually vanishes to the "vanishing point". This gives it a more realistic feel as if the wall is truly getting further and further away from my 3D location.

The last monocular depth cue is Atmospheric Perspective. In Minecraft, you can see here that in the circle closest to me the terrain is more defined whereas the same dirt/grass in the distance on the mountain just appears to be a brown and green color. This is a clear example of atmospheric perspective. It mainly results in the light traveling in the atmosphere which makes it so that objects closer to you are more defined.


FINAL PROJECT STEP 2: BUILDING MY IMMERSIVE LIBRARY/MUSEUM

I found this option to be particularly useful in creating my library. It allows for a superflat creative atmosphere!
Also another option I found useful was to change the Difficulty to "Peaceful" so that no monsters would disturb while I built my library.
I was able to start with this open space.
I decided to start my museum with a base that would be very unique. It would start as shown in the picture and continue until it reached a decent amount of floors (levels).
Wow that was a lot of work. Here is what the base is shaping up to be. I also made it so that it alternates colors.
Here I am working on building my snowman using ice.
 Wow here's my snowman that is complete.
Here I am building my tree using oak for the base of the tree.
 Working on the top part of the tree.
Done and complete with the tree.
Building my ceiling using lime-stained glass.
Building the golden throne!
 Complete! With a nice sunset in the background.
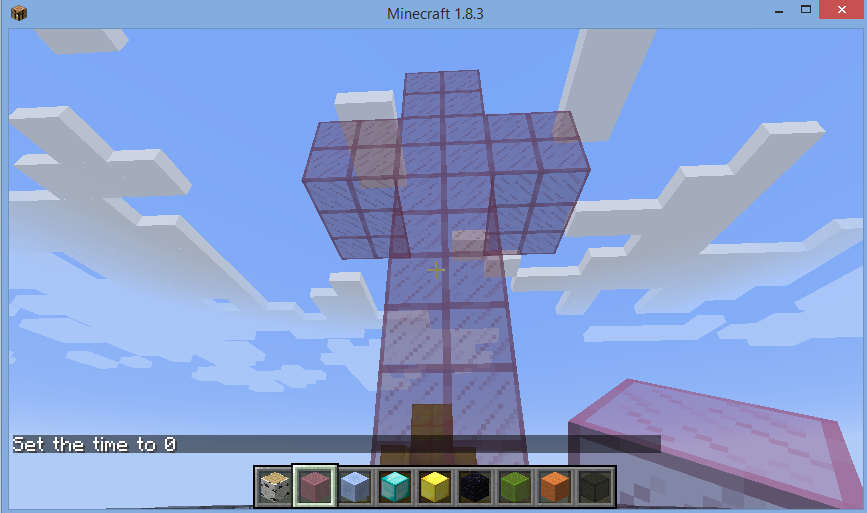
Building the cross using pink-stained glass.
Done building . Another handy tool was to be able to set the time of the day using the command (/time set 0).
 Adding a layer of black glass to the roof top.
 Floor finished.


FINAL PROJECT STEP 2: MY COMPLETED IMMERSIVE LIBRARY/MUSEUM

This is the start of my library/museum. I thought it was an interesting concept. It also took a long amount of time to complete.
Above the base is this flat layer in which you can see two of my objects. One is a tree, and the other a snowman!
 Snowman is here. Couldn't really do detail on the face but I gave him an orange nose and a hat as well!
Object #2 is a tree as seen here.
From the first platform I created 4 emerald pillars that goes high into the skies.
 Close look at the top of the four pillars. This was created using green tinted glass. I love building in Minecraft using the glass.
Inversely, the view looking down from the roof to the two object below through the glass.
 The view from the top. I created a black railing made of black tinted glass.
Object #3 is on the roof and is a cross made from pink-tinted glass.
My last object is this golden throne that sits on the top of the building.
View from the throne looking at the cross.

The roof as a whole
 The library as whole from far away!

Inventory
Base of Building (Picture 1) = 1500 Blocks
Four Pillars = 2400 Blocks
Tree = 60 Blocks
Snowman =  300 Blocks
Ceiling = 600 Blocks
Cross = 80 Blocks
Throne = 64 Blocks

Total: 5004 Blocks